Image Map

Wednesday, October 30, 2013

Royal Icing 'MONSTER-osities' {how NOT to decorate cookies}

Decorating cookies is time consuming. I always carefully draw and design my cookie ideas onto paper before actually making them. I have pages and pages of ideas drawn up just waiting to be made. Of course I have WAY too many ideas to ever make all of them into cookies, so you can imagine that when I do choose to make some, I pick my favorite designs. 

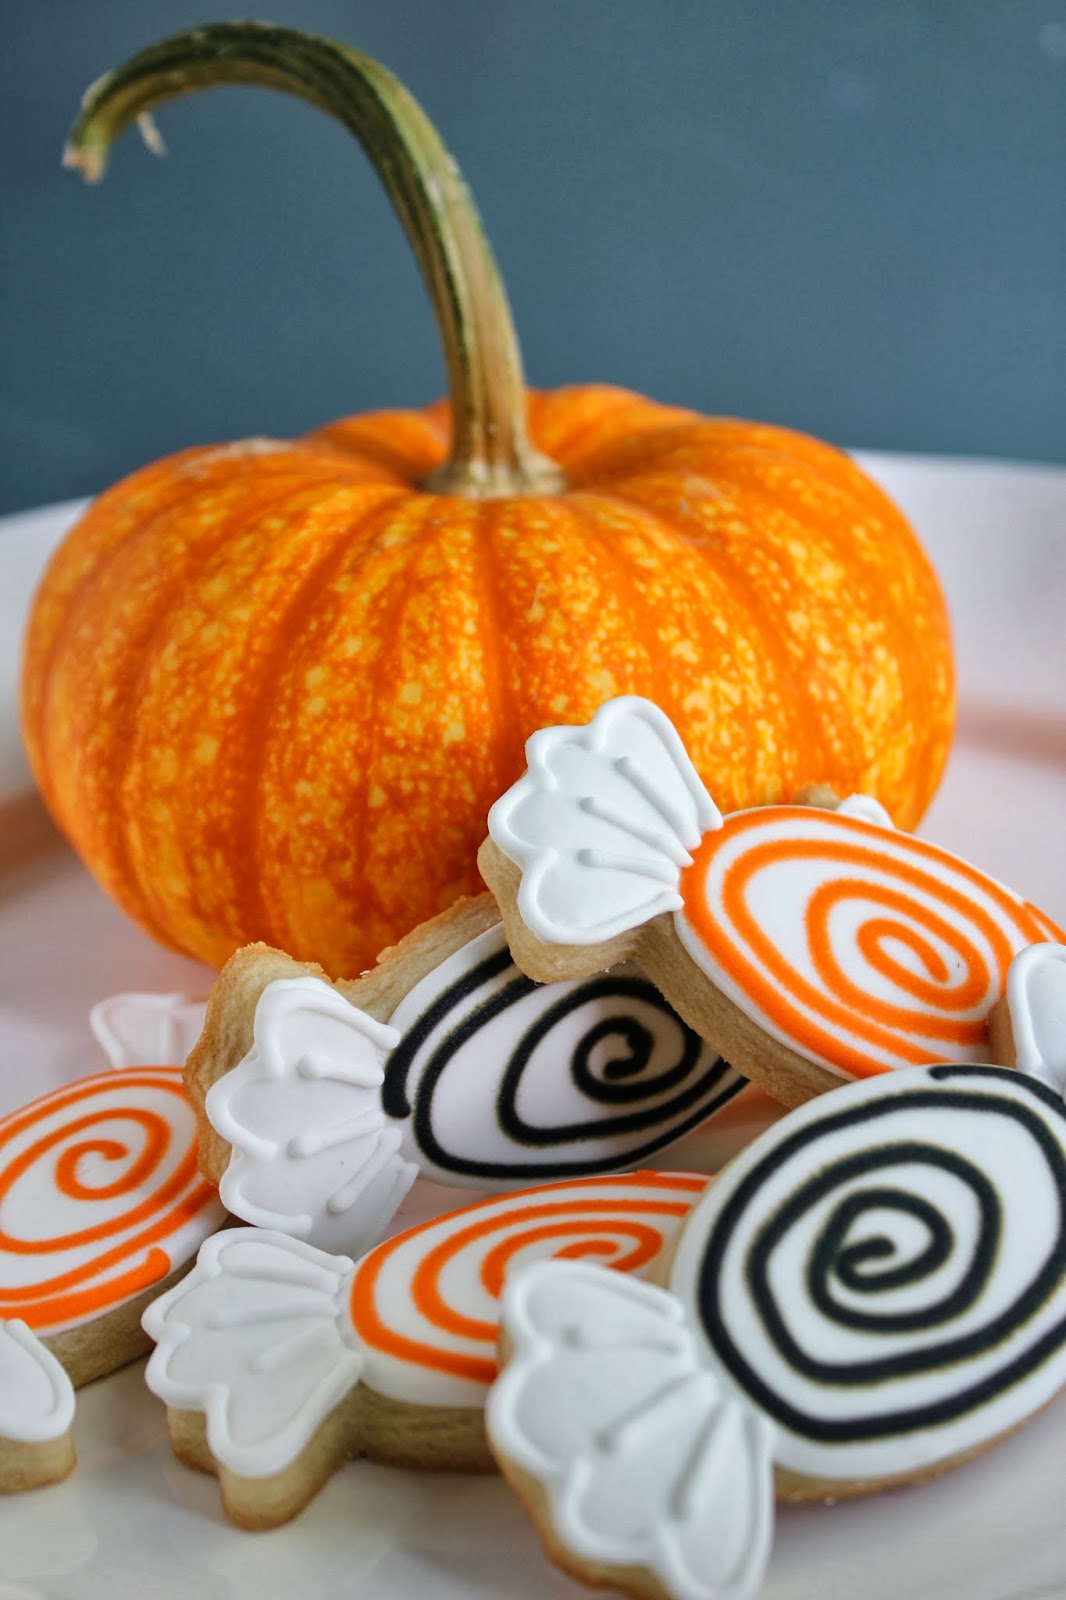
One of the best parts of cookie decorating is being able to see your finished product at the end.

Especially when they turn out just as you had imagined in your head. 

And then, there are always days like this....... 'Monster-osities'. The cookies only a mother could (pretend to) be proud of. 

Oh the horror. This is a good example of two mistakes that are easily made.


1. Not washing out your bowl before making royal icing. If you look at the purple and green, they have a funky grainy texture to them. (I decorated my voodoo doll cookies with the same icing, it's even more noticeable with them!) THAT is what happens when oil gets into your icing. Sometimes you may look at your bowl and think 'that looks clean enough to me'.

I'm warning you, DON'T fall into that trap like I did. These are the results of that exact thinking. And of course laziness. Because who wants to wash a clean mixing bowl?

You may not be able to tell from the pictures, but even after sitting out for 3 days these cookies never completely dried. 


2. Adding too much food coloring. Do you see the black? Horrible, I know. Color (especially dark colors like black or red) take time to develop. The best tip for making dark colors is to make a lighter color (like deep gray) and let it sit in the fridge for a couple days. THEN add more black if you need it. But usually after a day or two it becomes much darker

Don't try to make black in one afternoon. Trust me, it doesn't work if you want a true, deep black. 

After taking these pictures I waited a few more days and the black still never dried. 


It's always so sad when such tender loving care goes into making your cookies and then they come out like this! Hopefully this post will spare some of you from the same mistakes.


And thank goodness it was my 2 year old who ate them and not a neighbor or client :) Especially because the first time he saw himself in the mirror he started laughing and then said "Look mommy! Arrrrrrgh, I'm a pirate!"


Happy Halloween everyone! Hopefully your cookies won't turn out quite as scary as mine did. 


Saturday, October 26, 2013

Hand Painted Teacup Cookies


Sometimes I stay up so late doing cookies. Sometimes I take very last minute orders (like this one.. literally had one day to do them). It always makes me realize just how awesome my husband is. He stayed up with me for these ones and made carne asada at 1:00 am AND cleaned up my cookie dough and icing mess so we went to bed at 3:00 with a clean kitchen. Really though, it doesn't get any better than him. Makes cookie decorating a lot more fun when you don't have to clean anything up :). The best part is he does it to be nice, not because I ask. And he's a hunk, so that's nice too. 


I love how delicate and pretty these turned out. Perfect for a baby shower. Thanks for the order Katy!


Wednesday, October 23, 2013

Royal Icing {how to}

Royal Icing Tutorial. Everything you need to know to get started!

When I started decorating cookies as a hobby I tried probably 20 different Royal Icing recipes. Some used Merengue, some didn't, and some even used egg whites. They were all very similar so I basically just came up with my own through trial and error. You may try it and find you don't love it and make your own adjustments!  

SO HERE WE GO! ROYAL ICING MY WAY
(if you're not making a large batch of cookies you can cut this in half or even into fourths!)

Royal Icing
2 lbs {1 bag} confectioner's sugar
6 Tbsp Meringue powder
1/2 c. plus 2 Tbsp warm water
1 tsp. imitation vanilla (or any other non-oil flavoring!)


As the merengue powder goes, I just use wilton. I hear more expensive brands are better, but with my husband in law school and me in undergrad I like to stick with the less expensive option for now! So far it's worked perfectly. :)

Before you start ALWAYS.. like, ALWAYS, ALWAYS, ALWAYS (get the picture?) wash your mixing bowl and paddle/whisk attachment. If any oil at all gets into your icing, it will not set up or dry properly and you will be kicking yourself for not taking the extra five minutes!

Once the mixing bowl and attachment are washed, I whisk together the confectioners sugar and merengue powder. To that I add my warm water and flavoring. I usually add just a teaspoon or two more of the warm water, especially if it isn't humid outside. But be careful! Once you add the water you can't take it out, and the worst thing next to getting oil in your RI is getting it too runny. 

Some people choose not to flavor their royal icing, I think it makes all the difference though! My favorite combinations are vanilla and lemon, vanilla and orange, or vanilla and lime. Again, MAKE SURE the extract you buy is oil free! I've found 'imitation' flavorings are usually oil free. 

SOOO.. once the liquids have been added, I mix on medium high for 7-10 minutes. It should look fluffy and form stiff peaks like meringue. If you're a first timer, at this point you may think your icing is waaay too stiff, but have no fear, you've done it right if it looks like this. See? 

So stiff in fact, that your paddle attachment should stand on it's own without moving in the royal icing.


Now take a dish rag and dampen it with water, then place it over the top of your mixing bowl to keep the RI from getting a hard crust on the top. 


Here is where it can get a little bit tedious (especially if you're doing a lot of colors), but consistency is everything. When my cookies don't turn out as planned it is because my consistency was not right. 

From here I start on mixing colors and getting the consistencies right. Take desired amount of icing from your mixing bowl and put it into another (CLEAN, OIL FREE) bowl. Add coloring. Then add one teaspoon at a time add warm water into your icing. Stir until it reaches 'line' consistency. It should look about the same as toothpaste. Line icing should hold its shape nicely, but still be smooth enough to squeeze out of an icing bag without killing your hand. 


Now it's ready to bag (don't use it all, you'll want some of the same color for 'flood' icing). I like disposable decorating bags , a #2 or #1 tip and use twisty ties on the ends.


Now for the flooding consistency! I use the rest of the icing and slowly add more water until it is about the consistency of shampoo. A good rule of thumb is to lift your spatula and let the icing run off, the icing swirls should disappear within about 10 seconds. Once I have the right consistency I put my icing into decorating bags. This is where I am weird. I know most cookie decorators use squeeze bottles.. I tried em' and I don't like them! That's just personal preference. My flood icing goes into decorating bags without a tip and I cut the end just the tiniest big when I'm ready to decorate.


So the tips don't get clogged, I get another damp kitchen towel and fold it in half. Put the tip of your bag in the fold like this.


Just follow these steps until you've done all of the colors you plan to use for your cookies. You can store icing at room temperature or in the fridge. Good luck!


Wednesday, October 16, 2013

Voodoo Doll Cookies {inspired by treasure troll dolls)

Even though I had some MAJOR trouble with my royal icing (I'll talk about that in my next post), these are my favorite Halloween cookies thus far. Super easy and so cute! I used two cutters; gingerbread man and bumblebee. Cut the wing off the bumblebee to use as hair for your voodoo doll. I would love to do a bunch of these in mini size! Perfectly creepy for halloween and so easy. 


Happy October everyone!

Monday, October 14, 2013

Halloween Salt Water Taffy Decorated Cookies


Happy October! More Halloween cookies coming this week.. and a lesson learned too of what NOT to do.

Friday, October 4, 2013

Pumpkin Decorated Cookies {Easy Picture Tutorial}

Fall is in the air and I am LOVING it!! The leaves are starting to change here in DC and it is easily my favorite time of year. Plus fall means cookies.. so that's good. 

Because I promised to do a tutorial but haven't gotten around to it, I did a easy picture tutorial for you guys. This was an order for a Gender reveal party announcing the gender of their little 'pumpkin' (such a cute idea)! Her colors were gray, yellow and blue. 


Thanks for the order, Nicole! Congrats on baby boy :)