Royal Icing Tutorial. Everything you need to know to get started!
When I started decorating cookies as a hobby I tried probably 20 different Royal Icing recipes. Some used Merengue, some didn't, and some even used egg whites. They were all very similar so I basically just came up with my own through trial and error. You may try it and find you don't love it and make your own adjustments!
SO HERE WE GO! ROYAL ICING MY WAY
(if you're not making a large batch of cookies you can cut this in half or even into fourths!)
Royal Icing
2 lbs {1 bag} confectioner's sugar
6 Tbsp Meringue powder
1/2 c. plus 2 Tbsp warm water
1 tsp. imitation vanilla (or any other non-oil flavoring!)
As the merengue powder goes, I just use wilton. I hear more expensive brands are better, but with my husband in law school and me in undergrad I like to stick with the less expensive option for now! So far it's worked perfectly. :)
Before you start ALWAYS.. like, ALWAYS, ALWAYS, ALWAYS (get the picture?) wash your mixing bowl and paddle/whisk attachment. If any oil at all gets into your icing, it will not set up or dry properly and you will be kicking yourself for not taking the extra five minutes!
Once the mixing bowl and attachment are washed, I whisk together the confectioners sugar and merengue powder. To that I add my warm water and flavoring. I usually add just a teaspoon or two more of the warm water, especially if it isn't humid outside. But be careful! Once you add the water you can't take it out, and the worst thing next to getting oil in your RI is getting it too runny.
Some people choose not to flavor their royal icing, I think it makes all the difference though! My favorite combinations are vanilla and lemon, vanilla and orange, or vanilla and lime. Again, MAKE SURE the extract you buy is oil free! I've found 'imitation' flavorings are usually oil free.
SOOO.. once the liquids have been added, I mix on medium high for 7-10 minutes. It should look fluffy and form stiff peaks like meringue. If you're a first timer, at this point you may think your icing is waaay too stiff, but have no fear, you've done it right if it looks like this. See?
So stiff in fact, that your paddle attachment should stand on it's own without moving in the royal icing.
Now take a dish rag and dampen it with water, then place it over the top of your mixing bowl to keep the RI from getting a hard crust on the top.
Here is where it can get a little bit tedious (especially if you're doing a lot of colors), but consistency is everything. When my cookies don't turn out as planned it is because my consistency was not right.
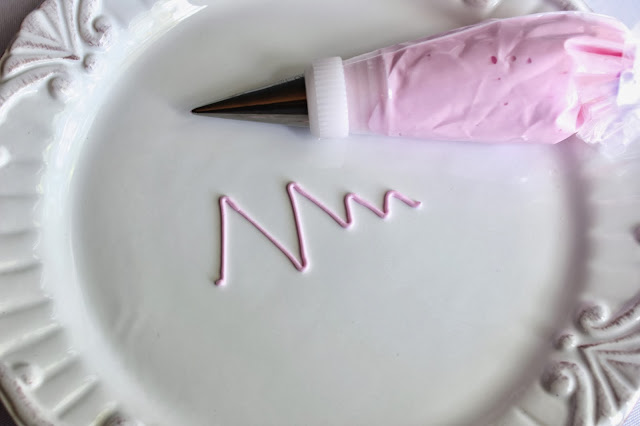
From here I start on mixing colors and getting the consistencies right. Take desired amount of icing from your mixing bowl and put it into another (CLEAN, OIL FREE) bowl. Add coloring. Then add one teaspoon at a time add warm water into your icing. Stir until it reaches 'line' consistency. It should look about the same as toothpaste. Line icing should hold its shape nicely, but still be smooth enough to squeeze out of an icing bag without killing your hand.
Now it's ready to bag (don't use it all, you'll want some of the same color for 'flood' icing). I like disposable decorating bags , a #2 or #1 tip and use twisty ties on the ends.
Now for the flooding consistency! I use the rest of the icing and slowly add more water until it is about the consistency of shampoo. A good rule of thumb is to lift your spatula and let the icing run off, the icing swirls should disappear within about 10 seconds. Once I have the right consistency I put my icing into decorating bags. This is where I am weird. I know most cookie decorators use squeeze bottles.. I tried em' and I don't like them! That's just personal preference. My flood icing goes into decorating bags without a tip and I cut the end just the tiniest big when I'm ready to decorate.
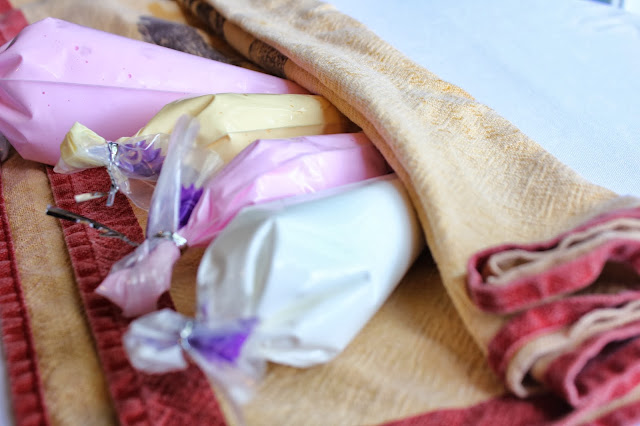
So the tips don't get clogged, I get another damp kitchen towel and fold it in half. Put the tip of your bag in the fold like this.
Just follow these steps until you've done all of the colors you plan to use for your cookies. You can store icing at room temperature or in the fridge. Good luck!


2 comments:
So do you like a 1 tip or a 2 tip better?
Totally depends on what I'm going for. If you want more of an 'invisible' line, use a #1 tip! If you want a thicker line (a lot less likely for icing to flood over the edge) use a #2 tip!
Post a Comment