Image Map

Saturday, March 17, 2012

Cookie Bouquet

This cookie bouquet was for a sweet little girl turning eight and getting baptized. 


Happy Birthday Ms. Claire!!

(don't mind the horrible lighting.. it was overcast and I didn't have much to work with)

Sunday, February 12, 2012

Pink Tuxedo Popcorn

This popcorn is so yummy! It's my mom's recipe and I absolutely love it. The funny thing is I've never really liked any popcorn beside butter popcorn.. but this is to die for. Recipe below, you're welcome :)

Tuxedo Popcorn
1 1/2 C. sliced almonds
10 C. popped popcorn
6 C. kettle corn 
10 C. mini marshmallow
20 oz. white chocolate
12 oz. semi sweet
12 oz. milk chocolate
8 oz. white chocolate chips
1 cup whole almonds

Preheat the oven to 350, and on a jelly role pan toast almonds 7-10 till golden brown. Pop all the popcorn and then in two large bowls (this is a huge recipe) mix popcorn, kettle corn, marshmallows and sliced almonds. Then melt 20 oz. white chocolate in the microwave for 1-2 minutes (stir ever twenty seconds or so to prevent burning). Pour the melted white chocolate over the popcorn and mallows mixture in the bowls to coat evenly. Immediately spread out on 3 cookie sheets and sprinkle whole almonds on top. Then melt (in individual bowls) and drizzle the remaining chocolate. I started with the dark chocolate, then milk then white, and as you can see I died half the white pink for Valentine's Day!! Chill for at least two hours before cutting into pieces, and ENJOY!


Aren't the labels the cutest thing?! I got them here!

Spread the LOVE!

Sugar Bea

Wednesday, February 8, 2012

Design Your Own Cookies Tutorial

For these cookies, I wanted to do owls but don't have an owl cookie cutter. So I made my own!

To make the owl, you'll need:
2 circle cutters (one smaller)
a Lemon cutter
a double heart mini cutter

Start with the large circle and put it on your cookie sheet. Then, using the lemon cutters, cut out your owls wings. After that use the smaller sized circle to take some dough off the top to make little ears. 


Then flip the mini double-heart cutter upside down to make the tail. 

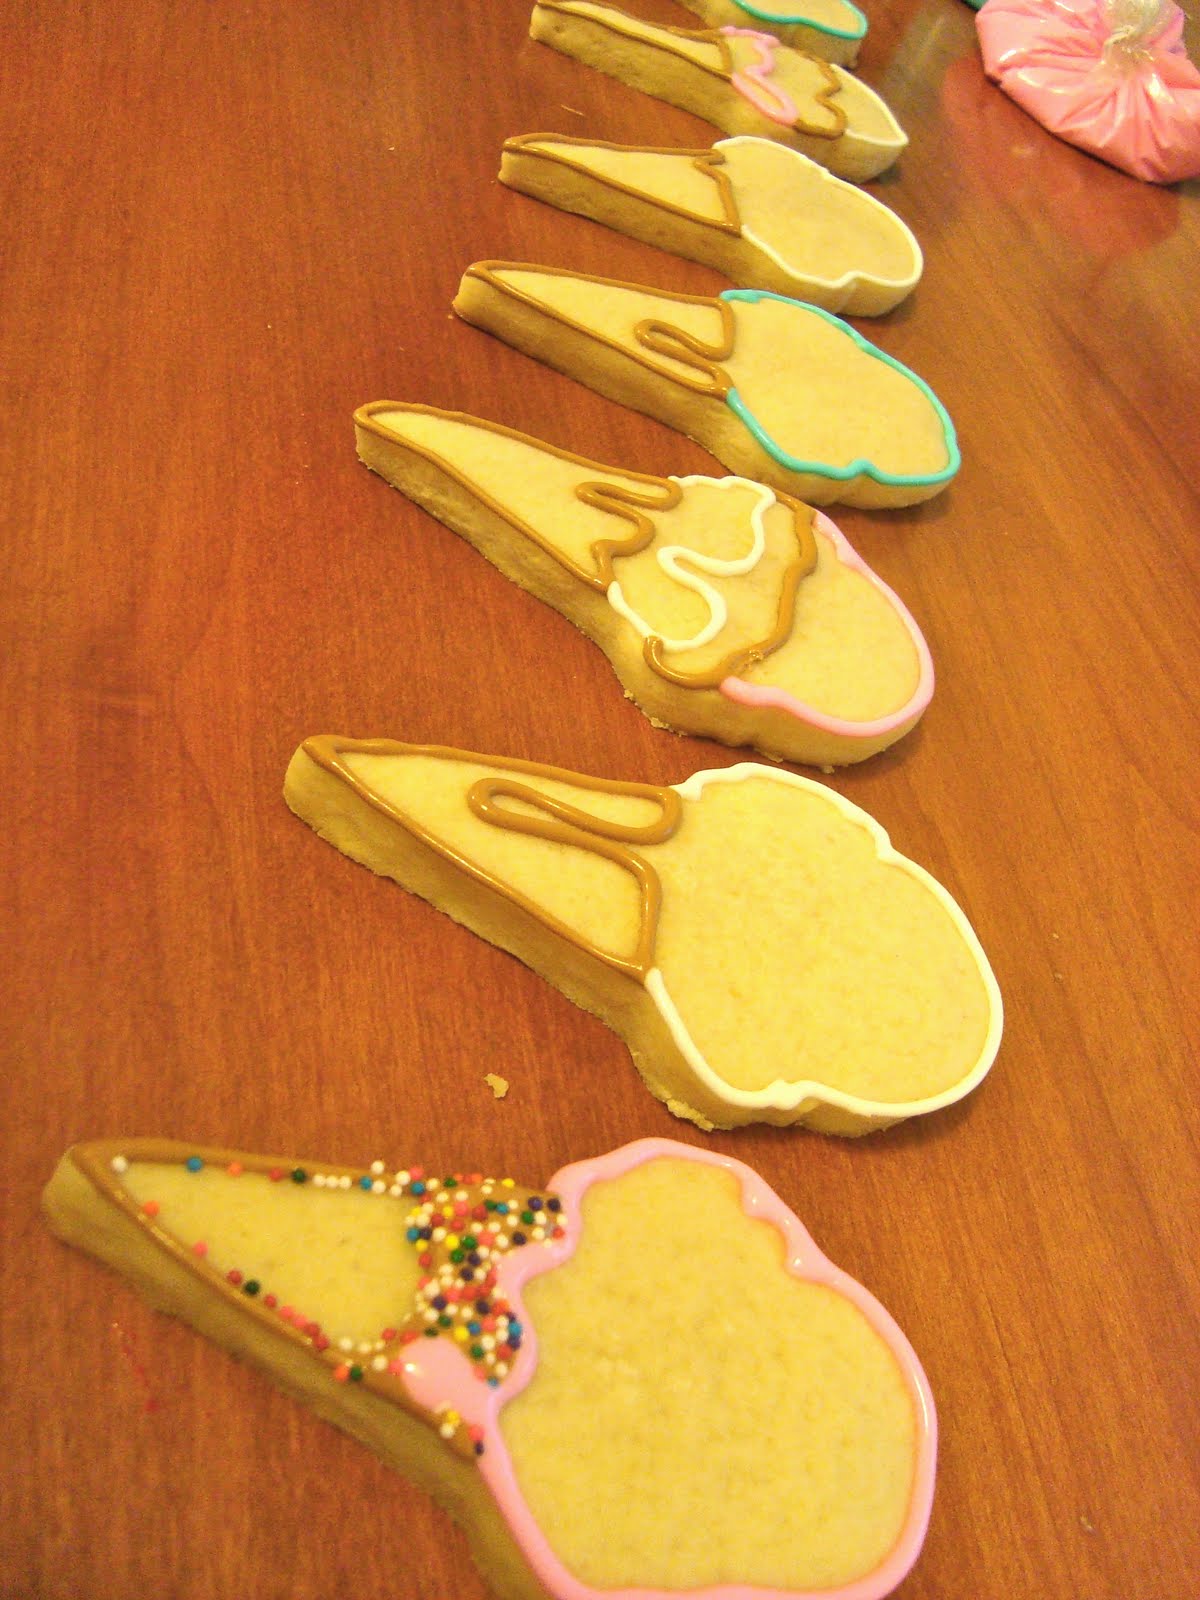
After you've baked your cookies, line..

.. and flood. (I let the wings and center dry over night before doing the rest)

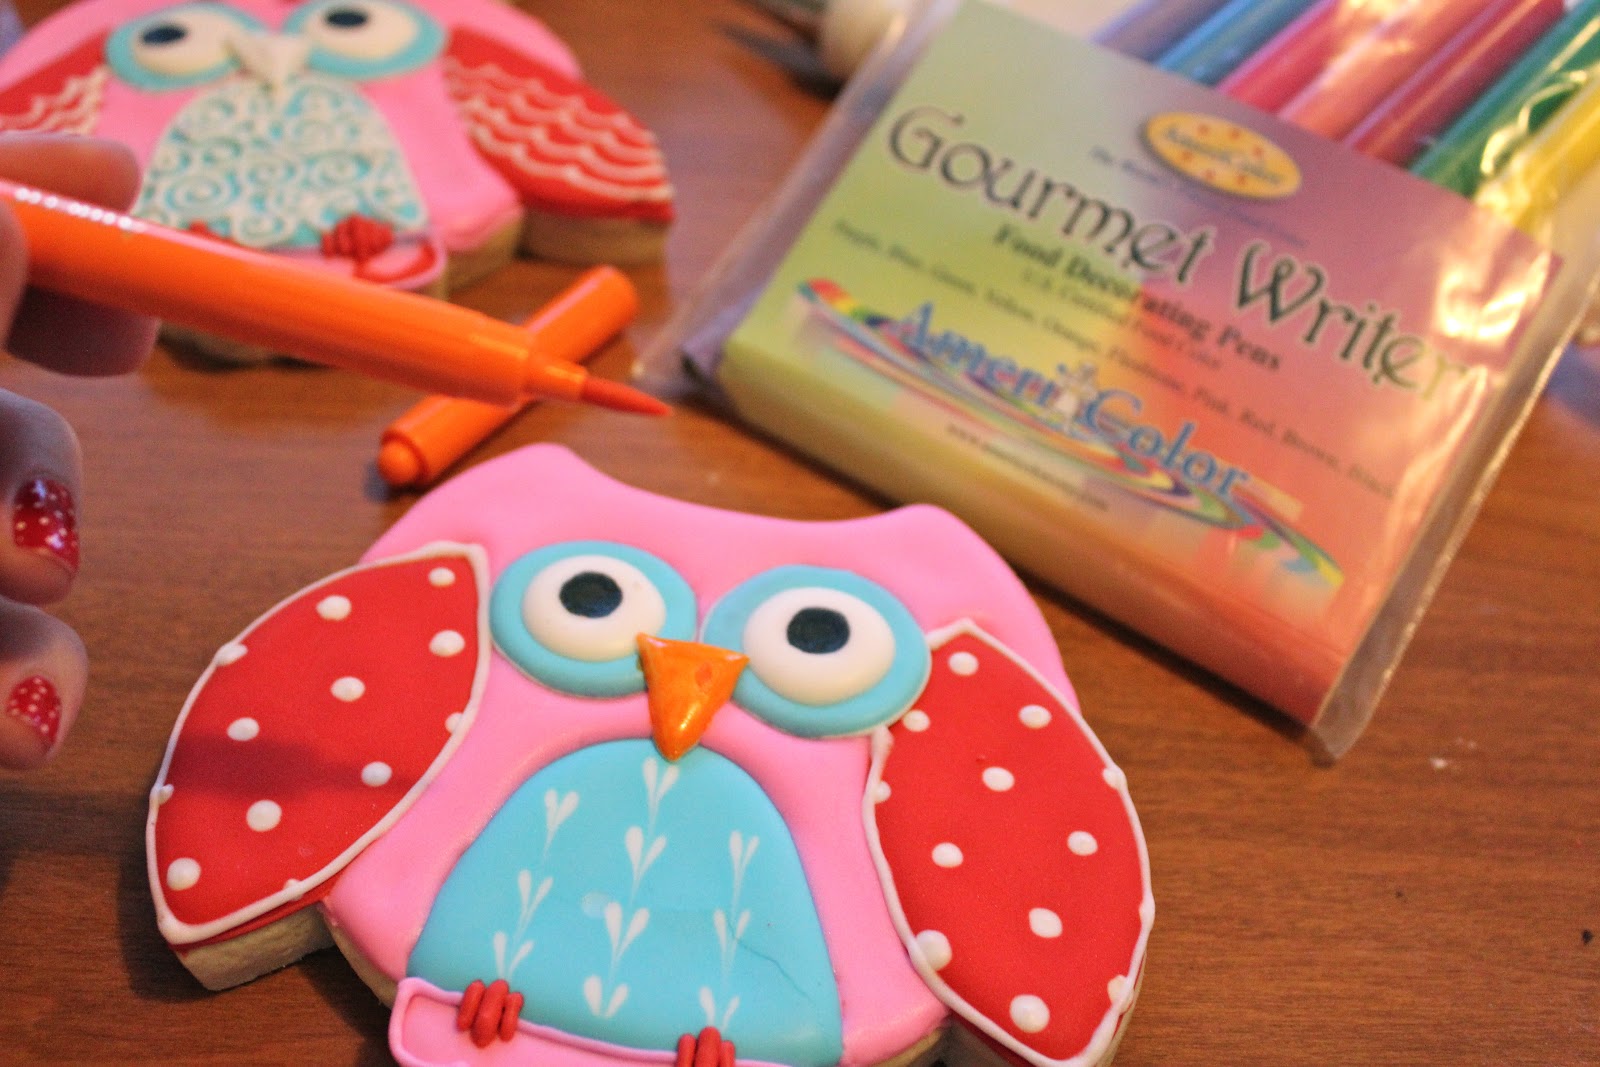
After the whole cookie is dry, pipe on a nose, and big owl eyes!

For the nose and eyes I used food color markers (a little secret, then you don't have to make two more colors of royal icing!). 

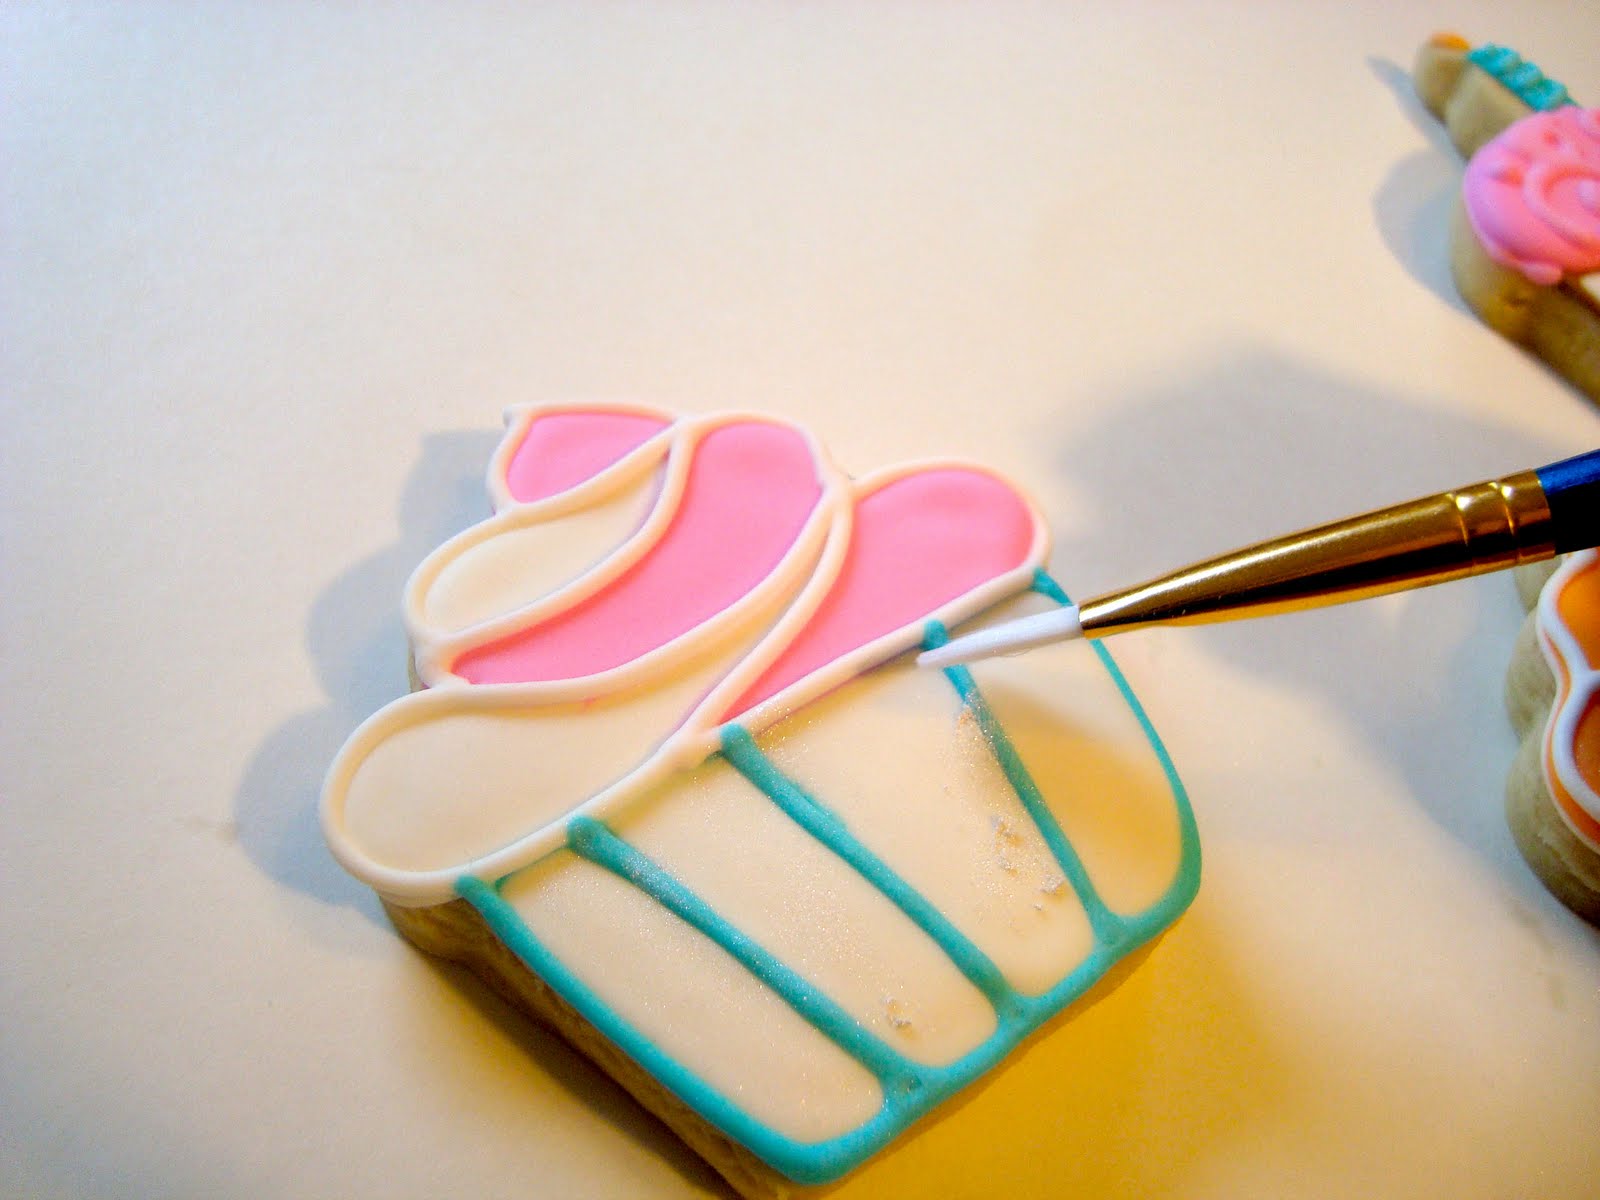
I love sparkly things.. so I always tend to dust my cookies with super pearl to make them sparkle!


And there you have it! Happy Baking :)

xoxo Sugar Bea

Sunday, February 5, 2012

"Owl" Be Your Valentine

 
Tutorial coming soon!

Follow Sugar Bea's on Pinterest!
(though I have NO IDEA what I'm doing, I will figure it out!)

Friday, February 3, 2012

Jar of Hearts Tutorial

These perfect little bite size cookies are so simple to make. Really, so easy! And sometimes, smaller is just better.. so you don't feel guilty for eating 28 in one sitting. 

Fist make your Royal Icing and mix the different colors you want. Then line away! I used a #1 tip to line these because of their size (on bigger cookies, I often use a #2 tip).


Once all the cookies are lined, go ahead and flood. Use a toothpick to pop any bubbles and to drag the icing to edge of the cookie.


While the cookies are still wet, add any designs you want! I did polka dots, XOXO, hearts and dipped some of them in white sanding sugar.. really the possibilities are endless! 

After you've decorated all your cookies, let them dry for about 10 hours.


And you've got yourself some perfect little Valentine's Day cookies! 


I gave mine as gifts and put them in a jar with white tulle tied around it. So cute (and yummy)!


Another Valentine post coming soon! If you have any questions on technique you are welcome to email me! If you'd like a tutorial on a certain method, just let me know and I'll see what I can do!

{Happy Baking}

Thursday, February 2, 2012

Jar of Hearts


These beauties are super easy, and perfect little bite size cookies. Mmm... 
Tutorial coming soon!

Saturday, September 3, 2011

How to Line and Flood a Cookie with Royal Icing

First make and roll out your dough. I always put my cutout dough on a cookie sheet in the freezer for about ten minutes before I bake it. This will prevent spreading.

You can buy precision rollers, but because I'm a poor college student I use wooden dowels! They work the exact same.

After your cookies are made it's time to make your Royal Icing. You can find my recipe and tutorial here.

Line your cookie with the thicker consistency (this is a #2 tip)

Once all cookies are lined, let them dry for about thirty minutes to an hour.

Now it's time to flood! I use a toothpick to drag the frosting to the edges. Make sure once the cookie is totally flooded to pop all the bubbles with your toothpick.

Once you've waited about 12-24 hours (depending on the size of the cookie), you can add the small details. I added super pearl dust to make my cupcake's sparkle!

I did a dry application with a paintbrush.


Until next time :)

Sugar Bea

Posts may be scarce the next little while due to being a full time student, a Mother and a Wife!